퍼플릭시티에 화면 기획서의 내용을 입력해주고 필요 내용을 입력해준다
<!DOCTYPE html>
<html lang="ko">
<head>
<meta charset="UTF-8">
<meta name="viewport" content="width=device-width, initial-scale=1.0">
<title>새 주문 생성</title>
<style>
body {
font-family: Arial, sans-serif;
max-width: 500px;
margin: 0 auto;
padding: 20px;
}
h1 {
color: #333;
}
form {
background-color: #f4f4f4;
padding: 20px;
border-radius: 5px;
}
label {
display: block;
margin-bottom: 5px;
}
input {
width: 100%;
padding: 8px;
margin-bottom: 10px;
border: 1px solid #ddd;
border-radius: 4px;
}
button {
background-color: #4CAF50;
color: white;
padding: 10px 15px;
border: none;
border-radius: 4px;
cursor: pointer;
}
button:hover {
background-color: #45a049;
}
#message {
margin-top: 20px;
padding: 10px;
border-radius: 4px;
}
.success {
background-color: #dff0d8;
color: #3c763d;
}
.error {
background-color: #f2dede;
color: #a94442;
}
</style>
</head>
<body>
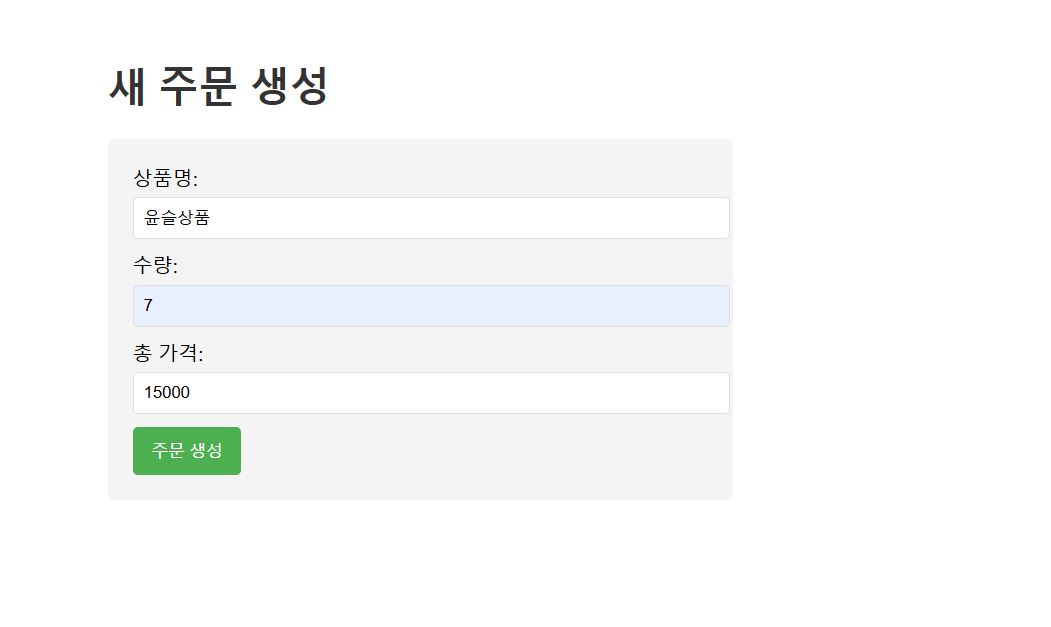
<h1>새 주문 생성</h1>
<form id="orderForm">
<label for="productName">상품명:</label>
<input type="text" id="productName" required>
<label for="quantity">수량:</label>
<input type="number" id="quantity" min="1" required>
<label for="totalPrice">총 가격:</label>
<input type="number" id="totalPrice" min="0" step="0.01" required>
<button type="submit">주문 생성</button>
</form>
<div id="message"></div>
<script>
document.getElementById('orderForm').addEventListener('submit', function(e) {
e.preventDefault();
const productName = document.getElementById('productName').value;
const quantity = parseInt(document.getElementById('quantity').value);
const totalPrice = parseFloat(document.getElementById('totalPrice').value);
// 유효성 검사
if (!productName || quantity < 1 || totalPrice < 0) {
showMessage('모든 필드를 올바르게 입력해주세요.', 'error');
return;
}
const orderData = {
productName: productName,
quantity: quantity,
totalPrice: totalPrice
};
fetch('http://localhost:8080/orders', {
method: 'POST',
headers: {
'Content-Type': 'application/json',
},
body: JSON.stringify(orderData)
})
.then(response => {
if (response.status === 201) {
showMessage('주문이 성공적으로 생성되었습니다.', 'success');
document.getElementById('orderForm').reset();
} else {
throw new Error('주문 생성에 실패했습니다.');
}
})
.catch(error => {
showMessage(error.message, 'error');
});
});
function showMessage(message, type) {
const messageElement = document.getElementById('message');
messageElement.textContent = message;
messageElement.className = type;
}
</script>
</body>
</html>
HTML: 웹 페이지의 뼈대를 만든다. (구조)
CSS: 웹 페이지의 디자인을 담당한다. (스타일)
JavaScript: 웹 페이지의 동작을 제어하고, API를 호출하여 데이터를 주고받는다. (기능)
이렇게 세 가지가 함께 사용되어 웹 페이지를 완성한다.
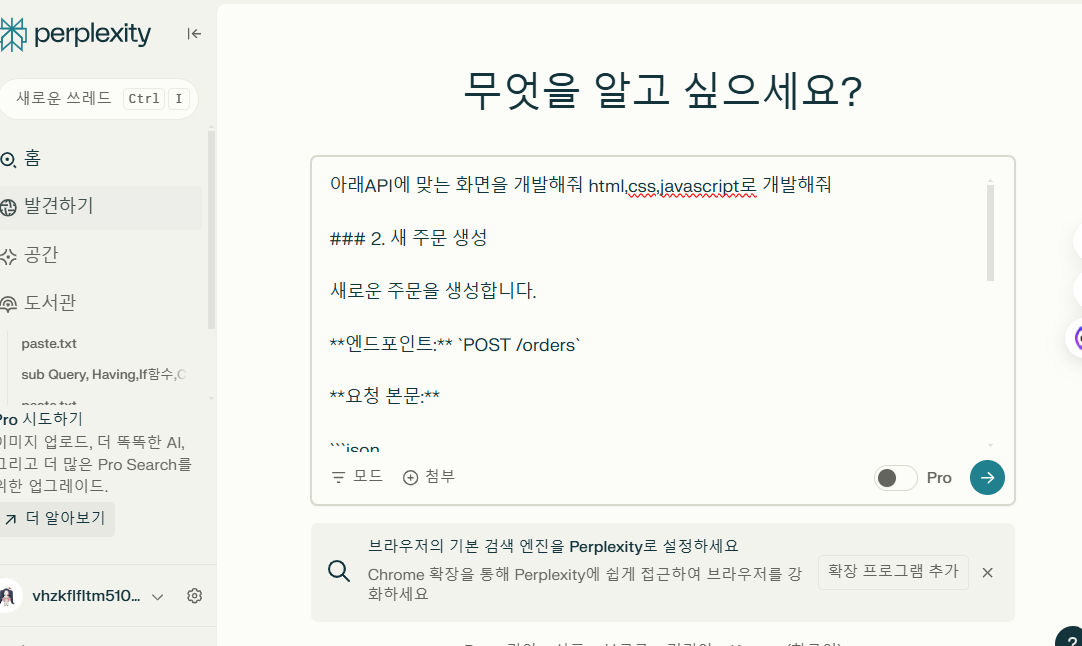
아래API에 맞는 화면을 개발해줘 html,css,javascript로 개발해줘
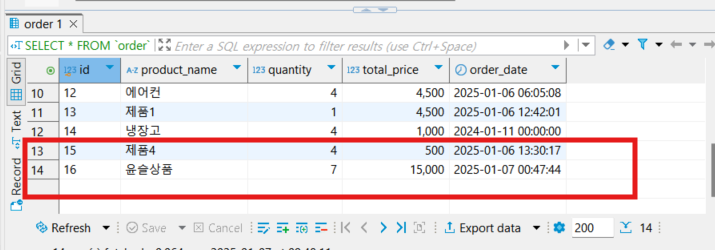
### 2. 새 주문 생성
새로운 주문을 생성합니다.
**엔드포인트:** POST http://localhost:8080/orders
**요청 본문:**
```json
{
"productName": "노트북",
"quantity": 2,
"totalPrice": 2000000.00
}
```
**유효성 검사 규칙:**
- `productName`: 필수, 비어있지 않은 문자열
- `quantity`: 필수, 최소값 1
- `totalPrice`: 필수, 최소값 0
**응답:** `201 Created`
- 응답 본문 없음
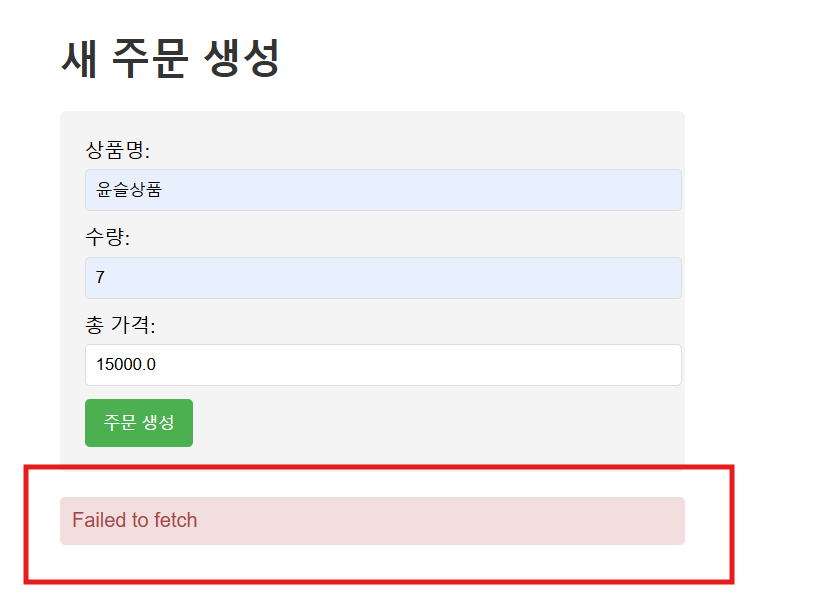
이래서 안돌아가는 것이다
애플 iOS 앱, 안드로이드 앱, 윈도우즈용 앱, 리눅스용 앱, 맥용 앱은 별도의 설정 없이 바로 실행된다.
하지만 웹은 CORS(Cross-Origin Resource Sharing) 처리를 해줘야만 한다.
그렇기 때문에, 해당 처리를 하지 않으면 웹에서는 정상적으로 동작하지 않는 것이다.

컨트롤러에 아래의 어노테이션을 추가를 해주면
@CrossOrigin(origins = "*")
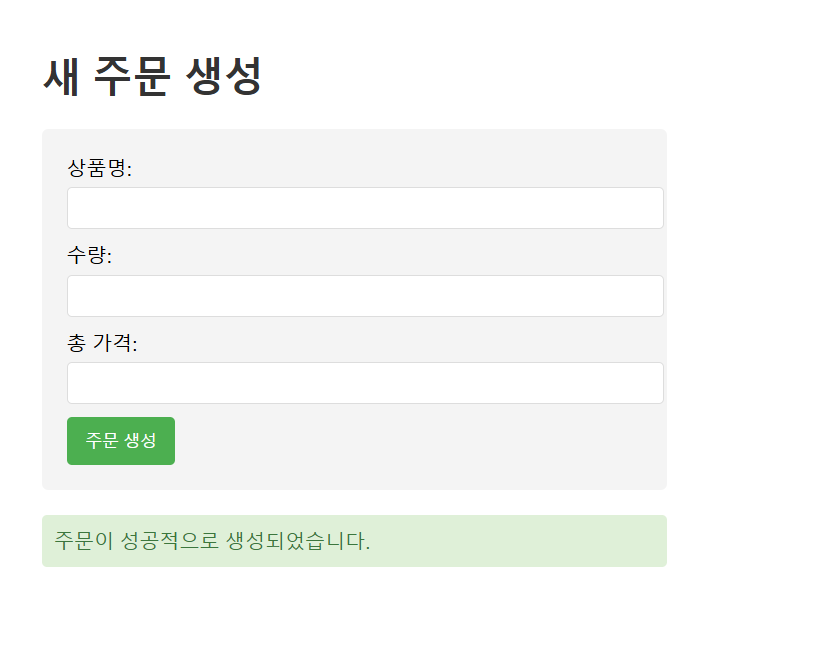
위 처럼 잘 들어옴을 확인 할 수 있다.
'Spring Boot JPA > 실습' 카테고리의 다른 글
| 여행코스 공유 플랫폼 JPA (0) | 2025.01.09 |
|---|---|
| JPA Join과 Config 설정으로 데이터베이스 관계 정리2 (0) | 2025.01.08 |
| JPA Join과 Config 설정으로 데이터베이스 관계 정리 (0) | 2025.01.07 |
| JPA Order API 실습 정리 : CRUD와 예외 처리까지 (0) | 2025.01.06 |
| JPA 실습 : 효율적인 데이터 관리 (1) | 2025.01.03 |